Workflow Testing
Run Test for the full workflow, single-node Test Run, and the test session (Active Session, Show Session, Clear Session) in the workflow editor.
This guide explains how to use Run Test, single-node testing (Test Run), and the test session in the workflow editor.
Workflow Testing Overview
Workflow testing helps you validate automation before relying on production runs or schedulers. There are two execution styles:
- Run Test — executes the entire workflow from start to end with the same kind of inputs you use for a real run, but marked as a test. Use this for end-to-end checks: branching, parameters, resources, and final outputs.
- Single-node test (Test Run) — runs one node in isolation with JSON inputs you supply (simulating upstream data). Use this for fast iteration when one step misbehaves or when you are tuning configuration.
Both styles share a test session: a per-user, per-workflow workspace that remembers test inputs, resource-related test state, and outputs from nodes you have tested. That session powers prefilled Run Test forms and optional “use previous node output” shortcuts in single-node tests.
Important
The main Workflow runs list is for production (non-test) runs. Test executions are intentionally kept out of that list so monitoring stays clean. Follow progress and results in the Run Test dialog (live updates) and in workflow testing tools, not in the standard runs table.
Important
Any action taken during testing has the same impact as in production—for example, creating cases, deleting users, or sending HTTP requests.
Run Test (Full Workflow)
What It Does
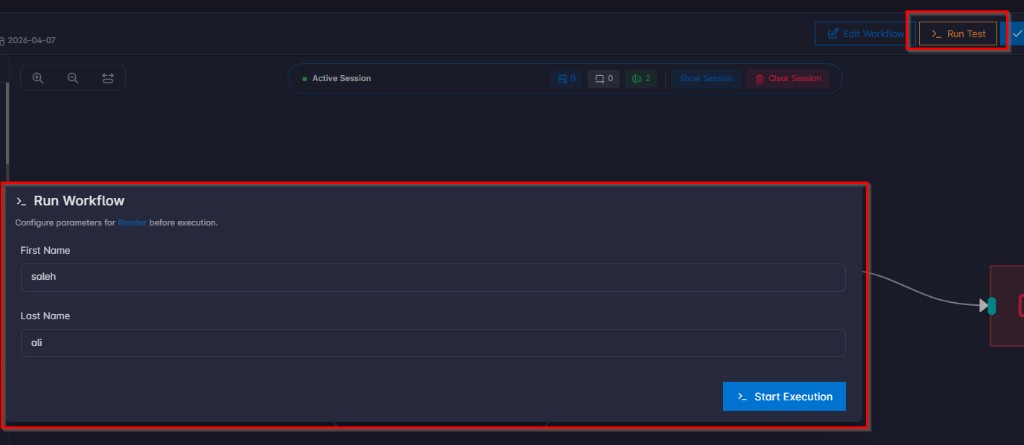
Run Test starts a full workflow execution using the workflow’s parameter form (the fields defined for that workflow). The run is treated as a test: it validates the graph end-to-end and updates your test session with the submitted parameters so you can reopen Run Test and see your last test values prefilled.
While the test runs, the dialog shows live progress (status, tasks, approvals if any). When tasks finish, you can inspect per-task results, errors, and logs in the same flow.
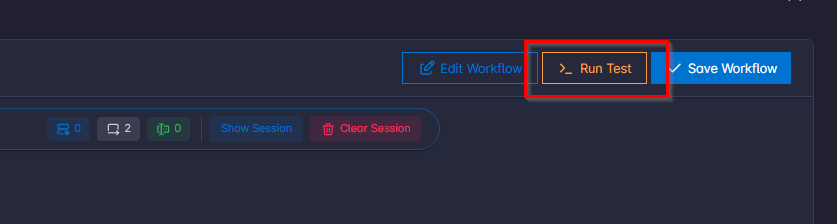
Where to Find It
Open the workflow graph editor for the workflow you want to validate. In the header area, use the Run Test action.
Prerequisites and Constraints
- Save first: If you have unsaved changes on the canvas, Run Test is disabled. Save the workflow so the test matches what you see on the graph.
- Workflow must be enabled: If the workflow is disabled, it cannot be run (including test runs).
- Same inputs as production: The form is the same schema used when starting a normal run from the workflows list; only the test flag differs behind the scenes.
Recommended Usage
- Finish editing and save the workflow.
- Open Run Test.
- Fill in workflow parameters (files, text, numbers, etc., as configured for that workflow).
- Start the run and watch progress in the dialog until it completes, fails, is cancelled, or waits for approval (if your workflow uses approvals).
- Inspect task outcomes and fix the graph or parameters as needed; repeat.
Tips
- Prefer a simple path first, then branch conditions, errors, and edge cases.
- After a successful test, consider enabling schedulers only when you are confident in production behavior.
Single-Node Test (Test Run on the Node)
What It Does
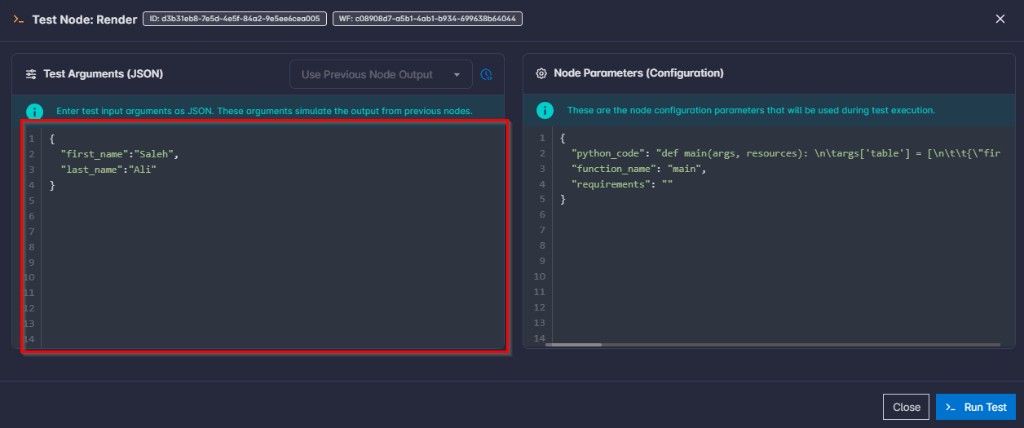
Single-node test executes only the selected node, with test arguments you provide as JSON. Those arguments represent what would normally arrive from upstream nodes—so you can debug one step without running the whole workflow.
The dialog also shows the node’s current configuration (parameters) as read-only JSON so you can confirm what will be used. To change configuration, edit the node in the workflow editor and save.
When the test finishes, you see structured output (when present), logs, and optional stdout/stderr debug sections—similar to how you would diagnose a task in a full run.
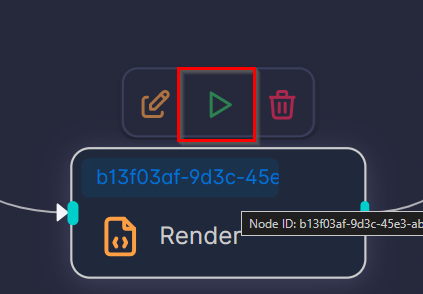
Where to Find It
In the graph editor, hover a node on the canvas. A small toolbar appears with (among other actions) Test Run (play icon). Open it to launch the single-node test dialog.
Test Arguments (JSON)
Enter valid JSON in Test arguments. Invalid JSON is rejected with a clear error.
Using Output From Upstream Nodes (Optional)
If directly connected upstream nodes have stored results in your current test session, a dropdown (Use previous node output) lists those nodes by name. Choosing one fills the test arguments field with that output (pretty-printed when possible). This is useful when you already ran a test workflow or tested upstream nodes and want the next node to consume realistic data.

Note
Only immediate predecessors (nodes with an edge into the current node) appear, and only when they have a usable result in the session.
While the Test Runs
- The task is started in the background; the UI polls for results on an interval until the run reaches a terminal state (success, failed, or cancelled).
- You can cancel an in-flight test from the dialog when it is still running.
When to Use Single-Node Test vs Run Test
| Goal | Use |
|---|---|
| Validate routing, multiple steps, end-to-end behavior | Run Test |
| Debug one failing or slow node, tune args quickly | Single-node test |
| Reproduce downstream behavior using real upstream output | Run Test or upstream single-node tests, then Use previous node output |
Test Session
What It Is
A test session is your private testing context for a given workflow. It is created or loaded when you work in the workflow editor and holds:
- Workflow test parameters — last (or merged) Run Test inputs stored as args for convenience.
- Resource-related test state — snapshots used while testing so file and connection behavior can be exercised without polluting production monitoring.
- Per-node outputs — results from nodes that participated in testing, used for features like previous node output selection.
It exists so you can iterate quickly, reuse values, and chain single-node tests without mixing test data into the main Workflow runs list.
Active Session Bar (Canvas)
When a session is available, the canvas shows an Active Session pill with quick counts, for example:

- Resources — how many resource entries are in session state.
- Nodes — how many node outputs are recorded.
- Workflow params — how many workflow parameter keys are stored in session.
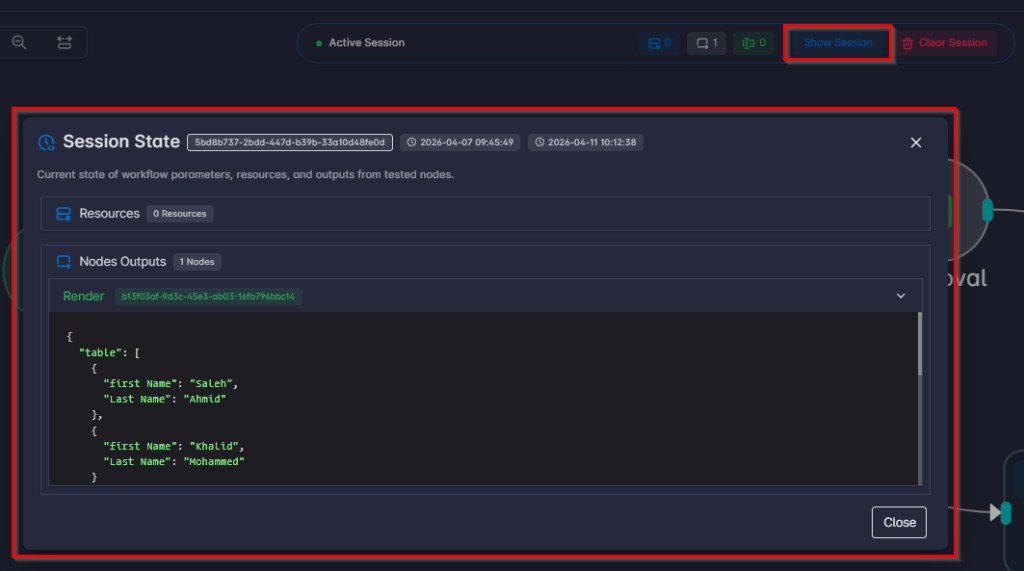
Show Session opens a Session State dialog with a structured view of workflow parameters, resources, and node outputs (with expandable sections and readable JSON where appropriate). Use it to inspect what the system will reuse for the next test actions.
Clear Session asks for confirmation, then removes test resources and stored outputs from the session. The session itself remains; counts reset so you start from a clean testing slate. Clearing does not delete underlying workflow run history used for audit or debugging elsewhere—it clears the session workspace described above.

When to Clear the Session
- Test data feels stale or confusing after many iterations.
- You changed resources or parameter schemas significantly and want predictable behavior.
- You want a clean acceptance pass before go-live.
How Sessions Interact With Run Test and Single-Node Tests
- Starting Run Test and submitting the form updates the session with your workflow args (and refreshes session data in the editor after start).
- Completing a single-node test refreshes session data so new node outputs can appear for downstream Use previous node output selections.
- Opening Run Test prefills the form from session args when available, so you can rerun with small edits.