Case Management
Run incident and case workflows from intake through reporting in SandsBytes.
Case Management
Case Management provides a complete workflow to create, investigate, and report incidents through a single case workspace.
Use this guide as a step-by-step walkthrough of common case operations.
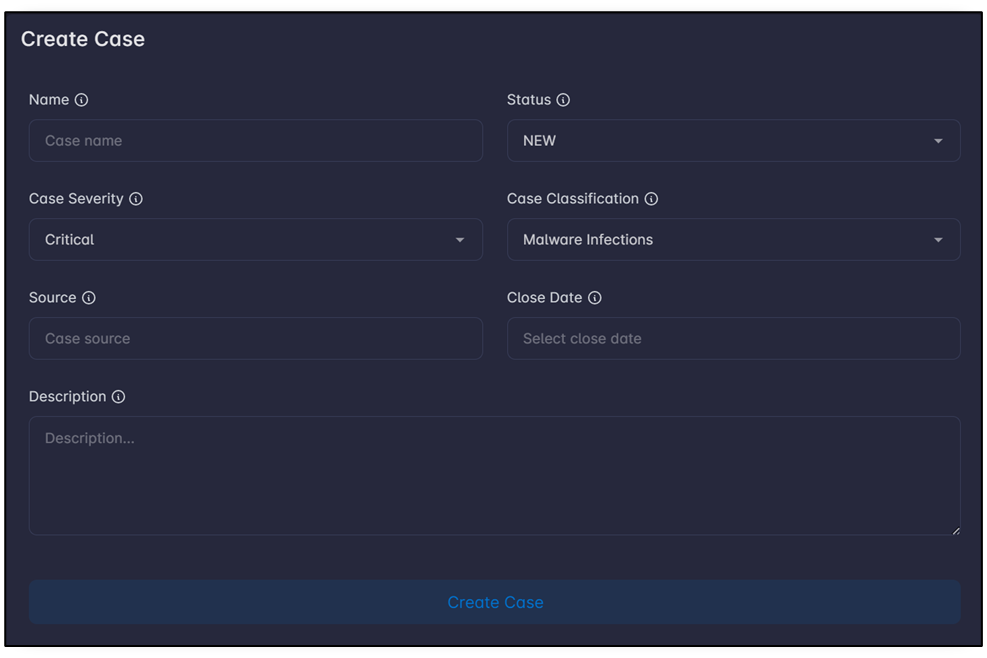
Create Case
To create a case, access the Cases page from the sidebar, then click Create.

-
Fill the case information.
-
Click Create Case.
To edit a case, click the Edit icon in the cases table.
![]()
After opening a case, the following sections are available:
| Section | Description |
|---|---|
| Case information | Description, name, severity, close date, and source of discovered incident. |
| Member assignment | List of assigned members to the case. |
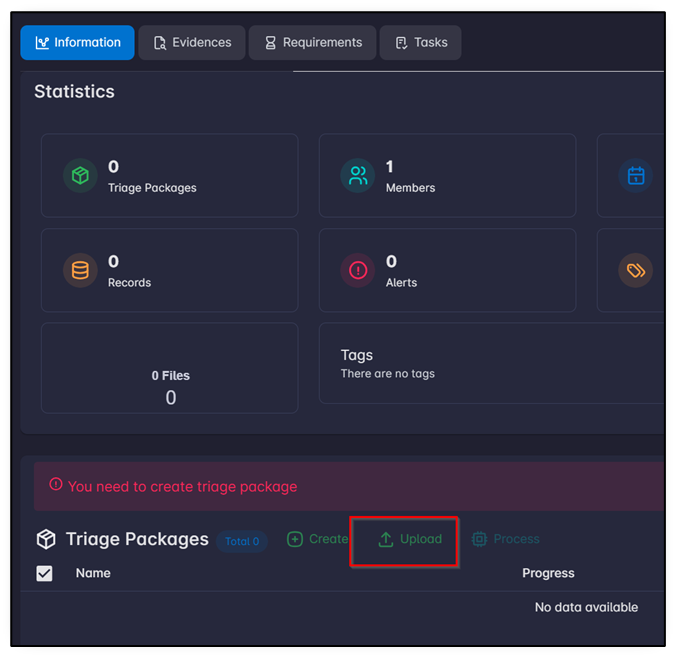
| Case statistics | General case metrics, including assigned members, tasks, requirements, alerts, tags from processed files, and total processed files. |
| Collected triage packages | List of uploaded packages for the case. |
| Case Evidence | Evidence collected from the environment, such as disk images, memory dumps, and PCAP files. |
| Case Requirements | Requirements from departments, third parties, or vendors. |
| Case Tasks | Tasks assigned to internal team members. |
| Findings | Analyst-confirmed findings related to suspicious or malicious activity in the case. |
| IoCs | Indicators of Compromise associated with findings in the case. |
| Files | Browsing and managing collected case files and package contents. |
| Case Timeline | Timeline of case-related milestones and procedural events. |
| Reports | Generated or uploaded case reports for download and sharing. |
| Remediations | Case remediation actions and response steps tracked for resolution. |
Upload New Triage Package
To upload a new triage package, open the case page and click Upload in Triage Packages.
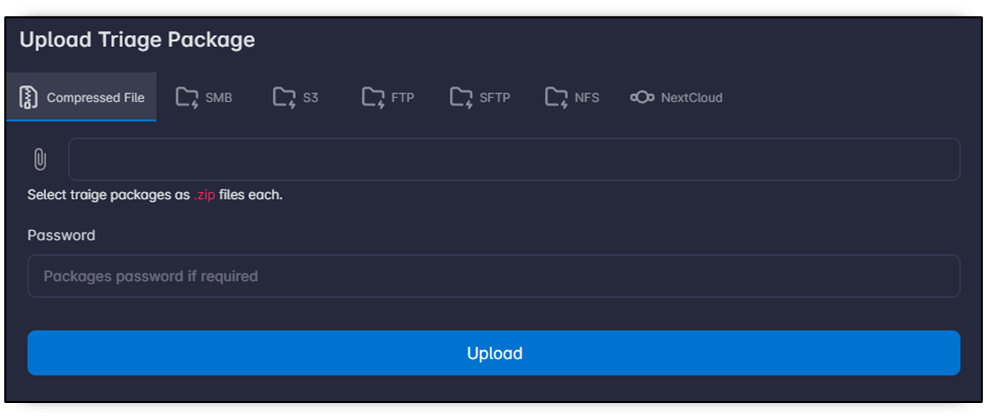
Triage packages can be added in two ways:
- Compressed file (
.zipor.tar.gz) - Remote shared folder through
SMBFTPSFTPNFSNextCloud, or similar sources
Upload Compressed ZIP File
-
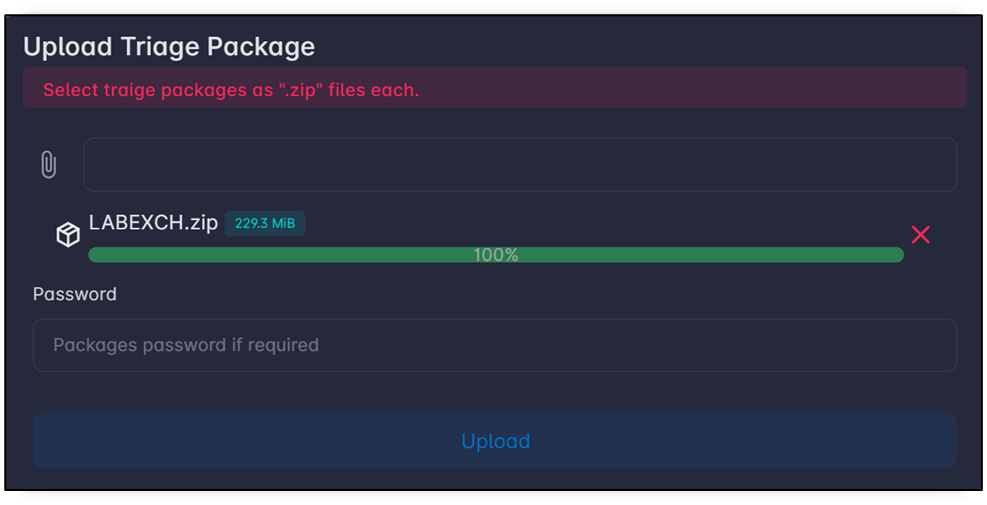
Select the Compressed File tab.
-
Wait until upload finishes.
Note
Provide the password if the file is protected.
Share Triage Package Remotely
-
In the upload window, select the remote protocol (for example:
SMBS3FTP).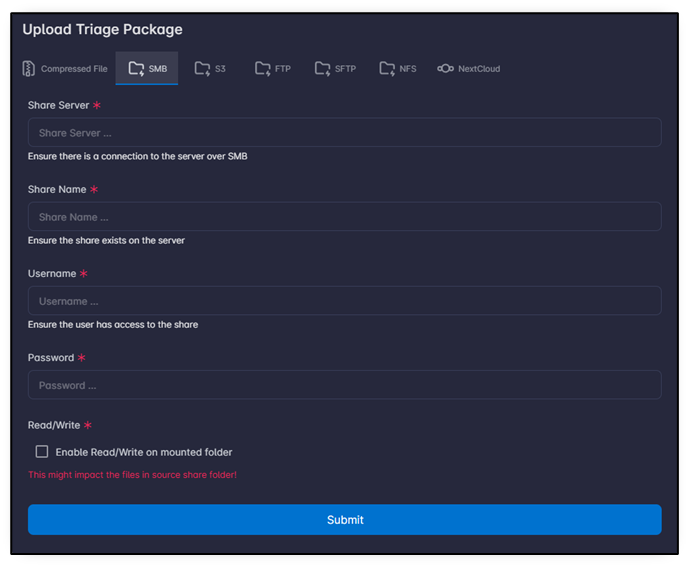
Note
Ensure there is network connectivity between the SandsBytes server and the remote machine. Also, make sure the provided credentials have permission to read from the specified remote share.
Note
It is not recommended to enable read/write on the remote mounted share to avoid any overwrite of evidence.
-
Submit and wait for the package to appear in the Triage Packages table.

The folder-bolt action in the table indicates how many remote shares are mounted for the package.
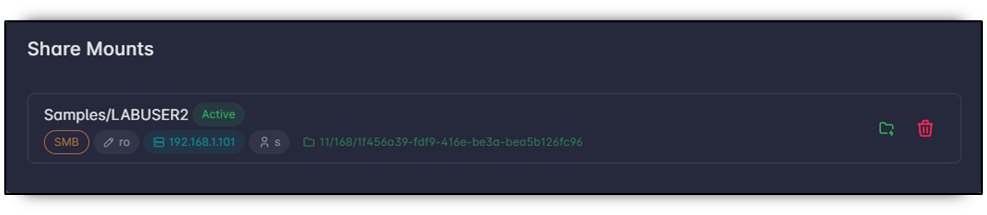
Note
Active/Inactive indicates whether a remote share is currently mounted.
To activate or deactivate a remote share, click the folder-bolt action.
Note
It is not recommended to keep remote shares active after evidence processing is complete and no longer needed. Ensure the remote mount is deactivated or deleted.
Browse Triage Packages
To browse uploaded packages, open the case page and select the Files tab.
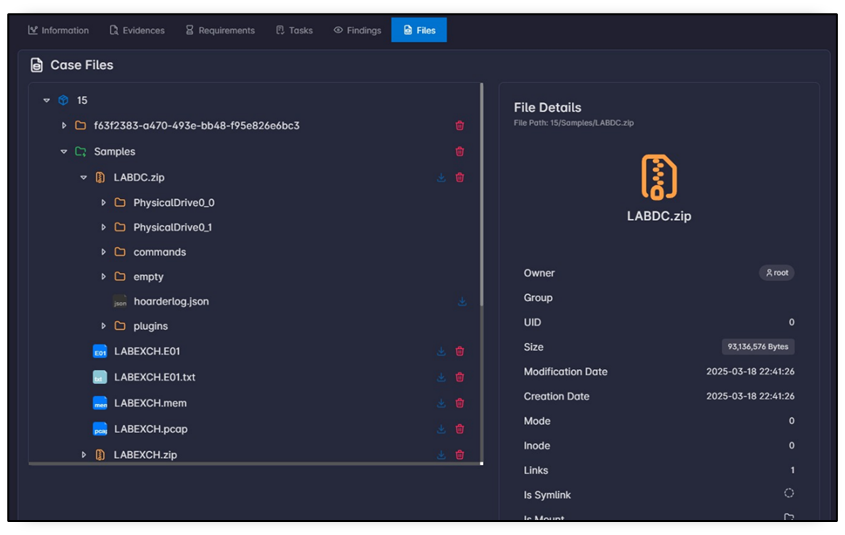
The interface shows available packages and their contents regardless of storage location:
- Local files
- Mounted remote files (shown with a green folder icon)
The system also supports recursive browsing inside .zip archives without requiring extraction.
From the same interface, you can download or delete individual files.
Process Triage Package
Process selected triage packages to run parsers and extract structured records for investigation.
-
Select one or more packages in the Triage Packages table.
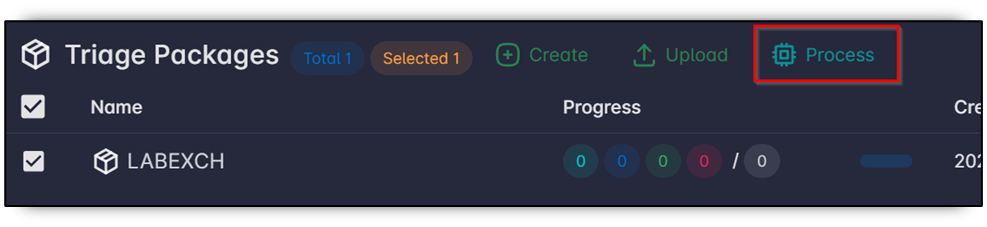
-
Click Process.
-
Select parsers to execute.
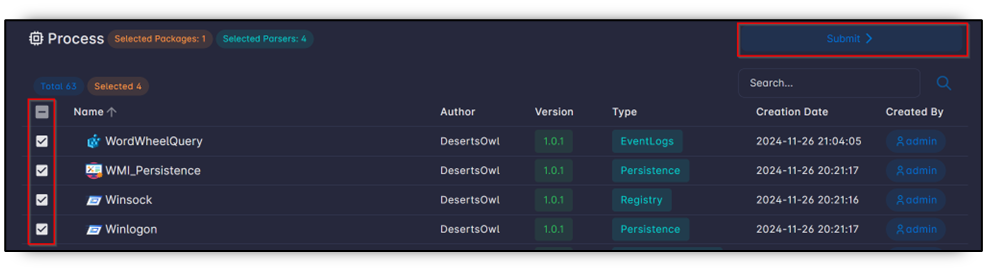
-
Click Submit.
-
Wait for processing to start.
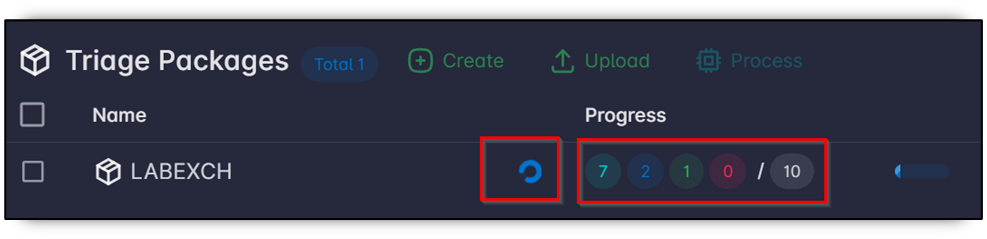
-
Monitor progress values:
Status Description Pending Files waiting in the queue to be processed. Running Files currently being processed. Done Files that finished processing successfully. Failed Files that could not be processed successfully. Total Total number of recognized files in the selected package(s).
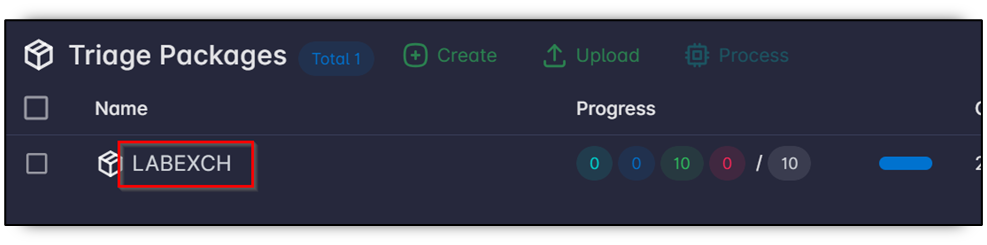
List Processed Files
Use the Processed Files view to inspect parser outcomes, record counts, and file-level processing details.
-
Click a triage package in the Triage Packages table.
-
Review the Processed Files list, including:
Field Description Status Pending, Running, Done, or Failed. Pushed records Records parsed and pushed to the database. Failed records Records processed but failed to be stored in the database (refer to the parser regarding such an issue). 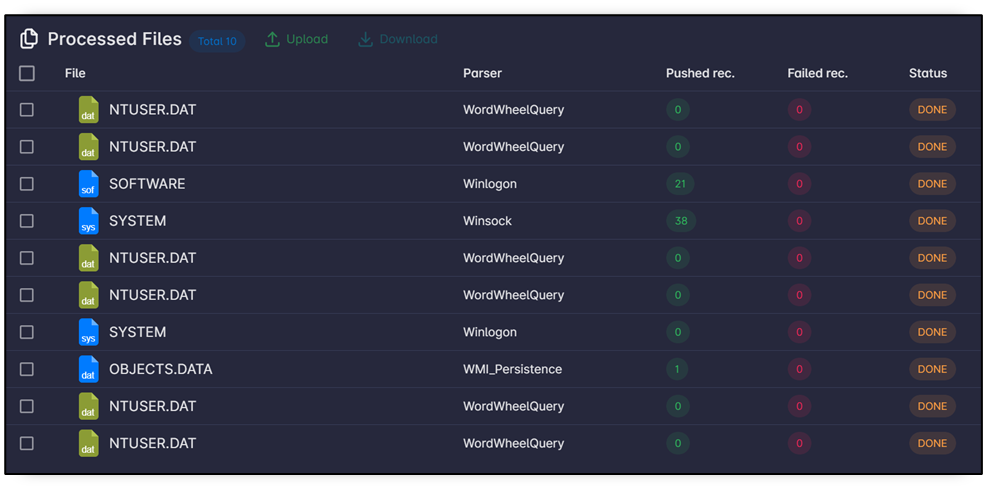
Note
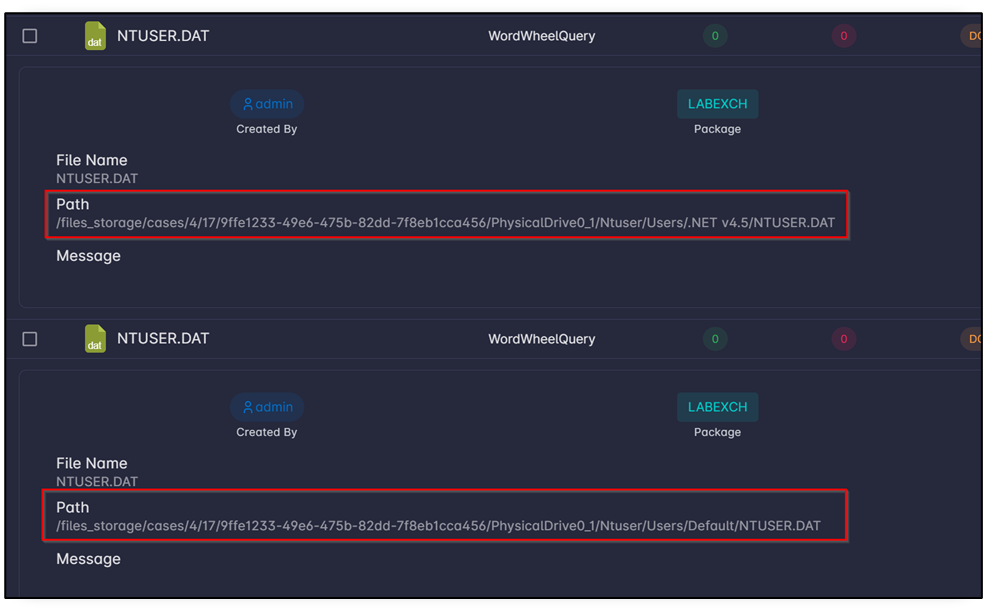
Processed files represent the file-parser pair. For example, if multiple parsers are executed on a single
NTUSER.DATfile, that file appears multiple times with different parsers. -
Click a row to open full file details, including the full stored path.
-
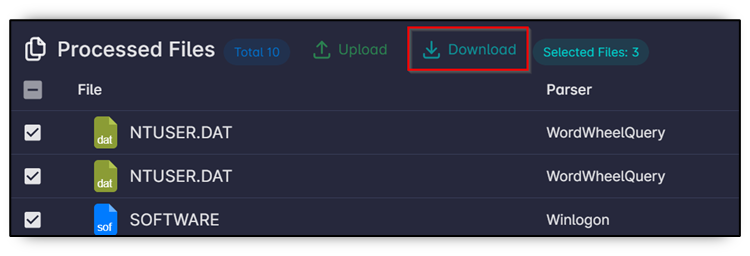
To upload files to an existing package, click the Upload action in the package Actions column.

-
To download files, select the target files and click Download. The browser downloads a compressed package containing the selected files.
Assign Members to the Case
Assign case members so they can collaborate on case tasks, requirements, findings, and related actions.
-
Open the case page.
-
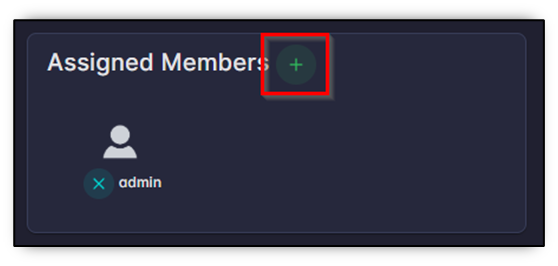
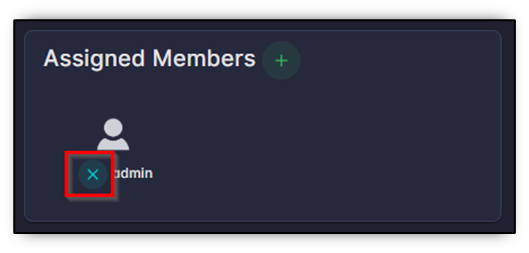
In Assigned Members, click the + button.
-
Select a user to assign.
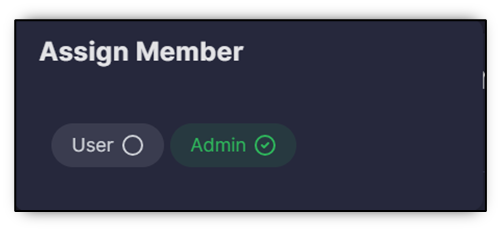
-
Confirm assignment.
To remove a user from the case, click the x button next to that member in Assigned Members.
Add Evidence to Case
Add evidence records to document collected artifacts such as images, dumps, captures, and related metadata.
-
Open the case page.
-
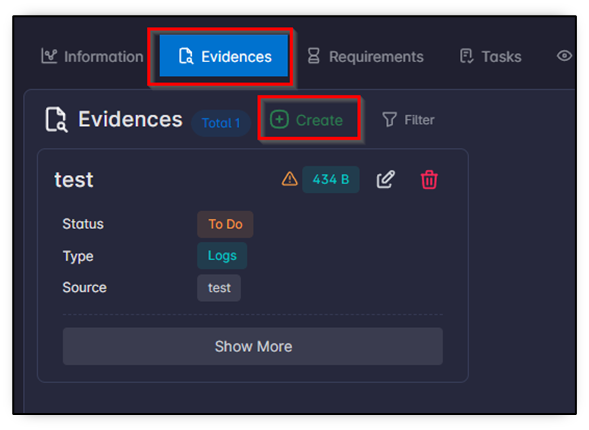
Open the Evidence tab.
-
Click Create.
-
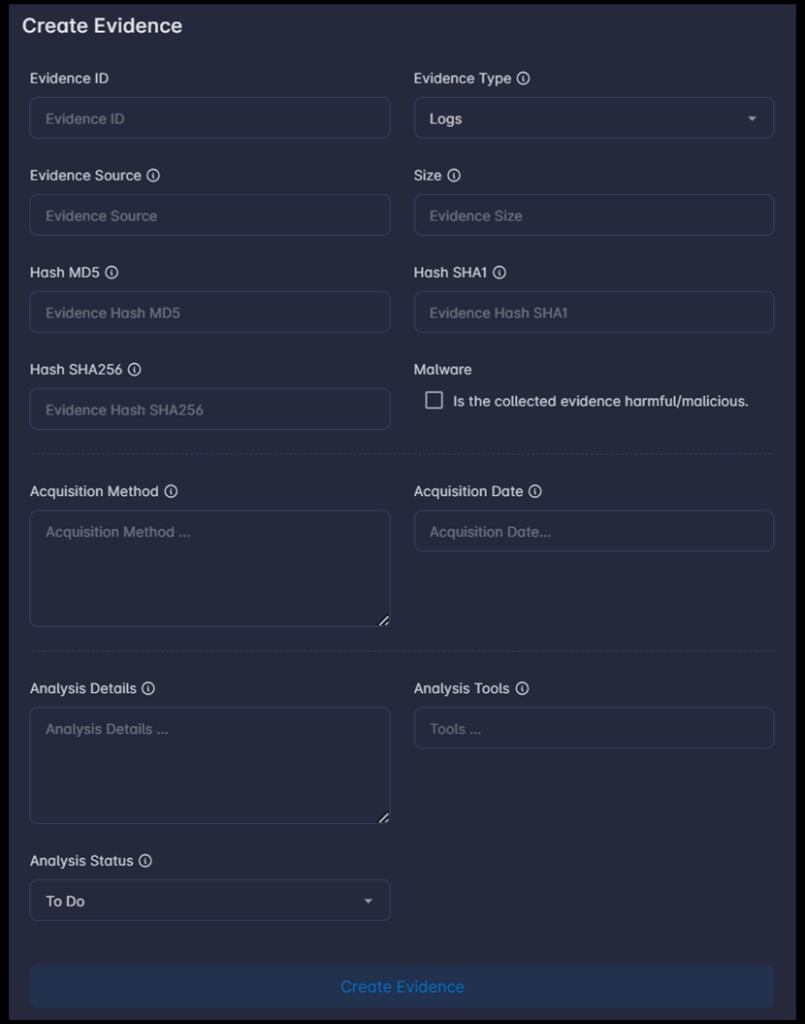
Fill in the evidence information.
-
Click Create Evidence.
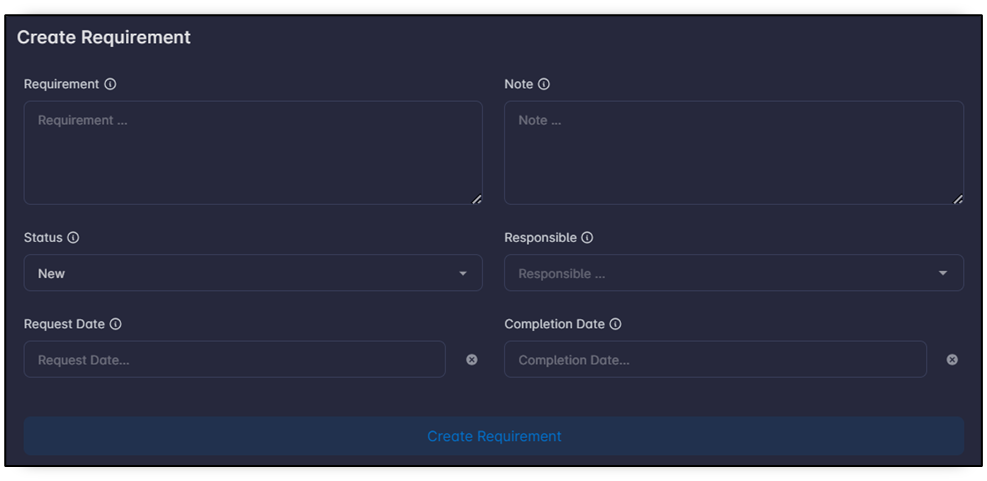
Add Case Requirement
Create requirements to track requests, dependencies, and obligations from internal or external stakeholders.
-
Open the case page.
-
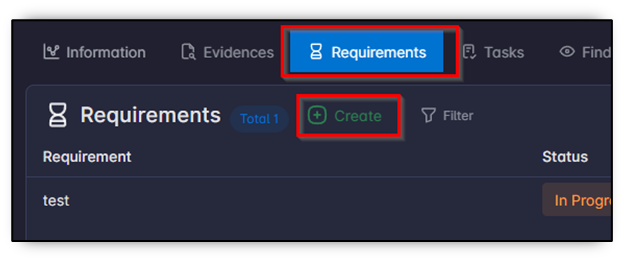
Open the Requirements tab.
-
Click Create.
-
Fill in the requirement information.
-
Click Create Requirement.
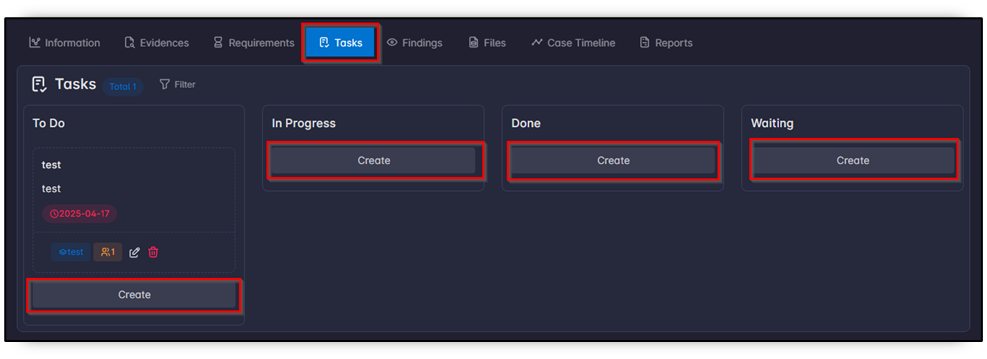
Create Case Task and Assign to Member
Create tasks to organize investigation work and assign responsibilities to case members.
-
Open the case page.
-
Open the Tasks tab.
-
In the Kanban board, click Create from the phase column.
-
Fill task information, including assigned users.
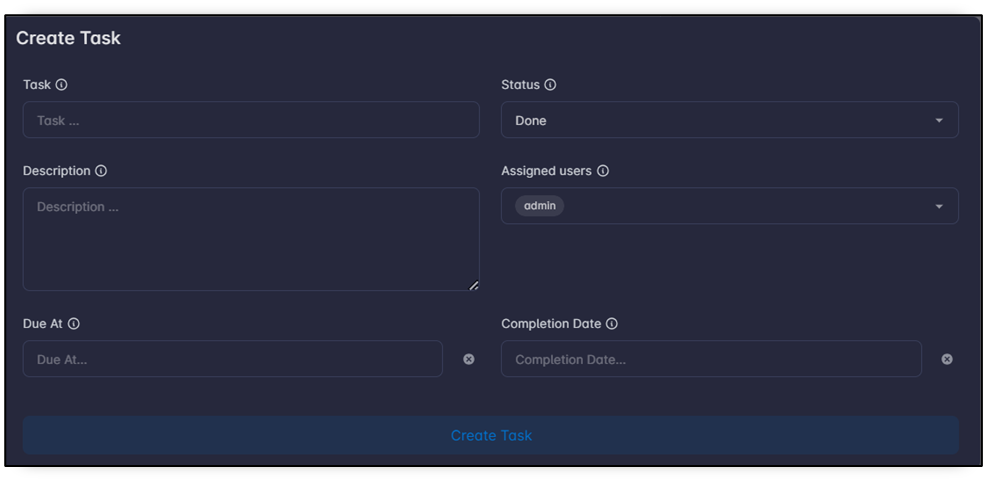
Note
The assigned users field only displays members assigned to the case.
-
Save.
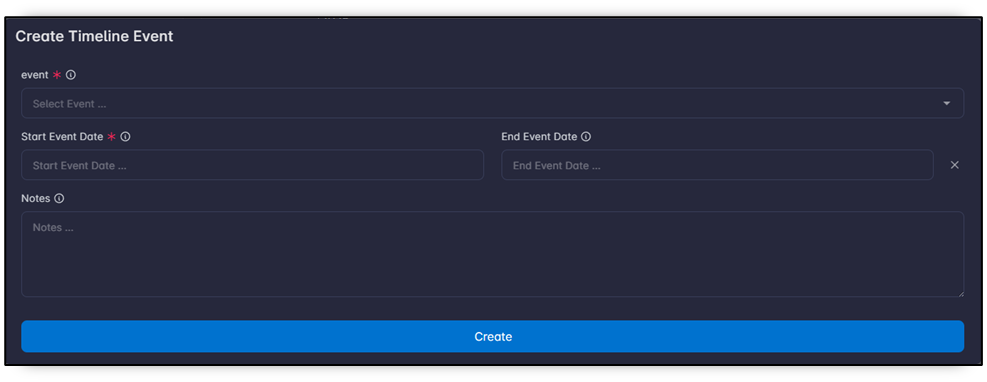
Create Case Project Timeline Event
Users can add custom events to the Case Project Timeline to capture milestones in the case lifecycle, such as case opening, request received, analysis start, and analysis end.
Note
The Case Project Timeline is intended to track case-related activities and procedural events, not attacker-related findings or IoCs.
This feature improves auditability and supports accurate reconstruction of the case handling process.
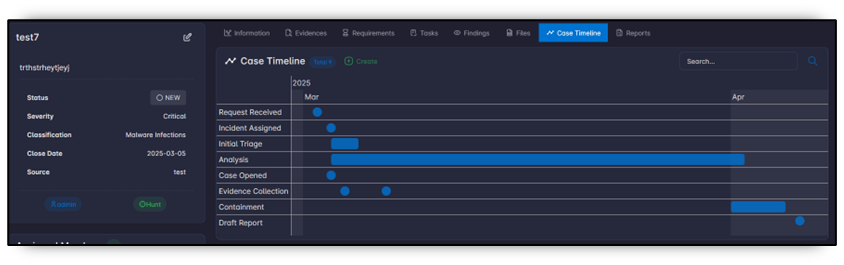
Each event can include both start and end dates. If no end date is provided, the event is treated as a single-point milestone.
-
Open the case page.
-
Select the Case Timeline tab.
-
Click Create.
-
Fill event information and save.
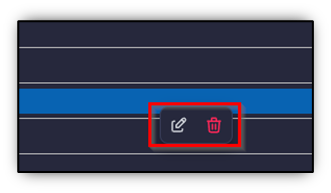
To edit or delete an event, right-click the target event in the timeline chart and select the required action.
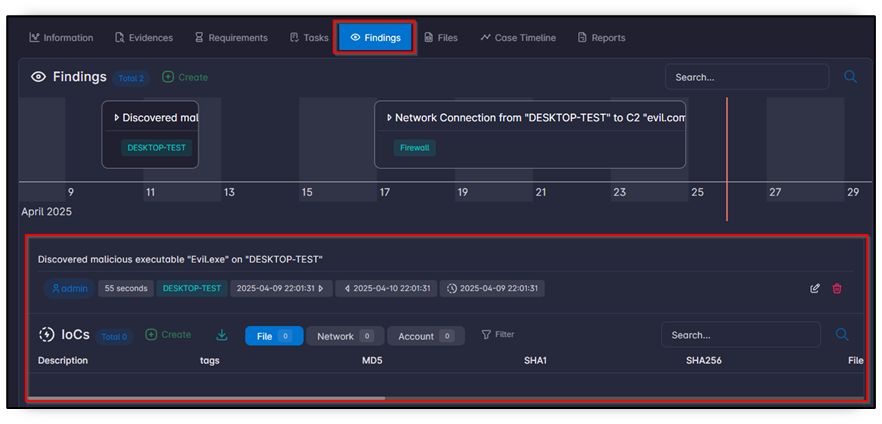
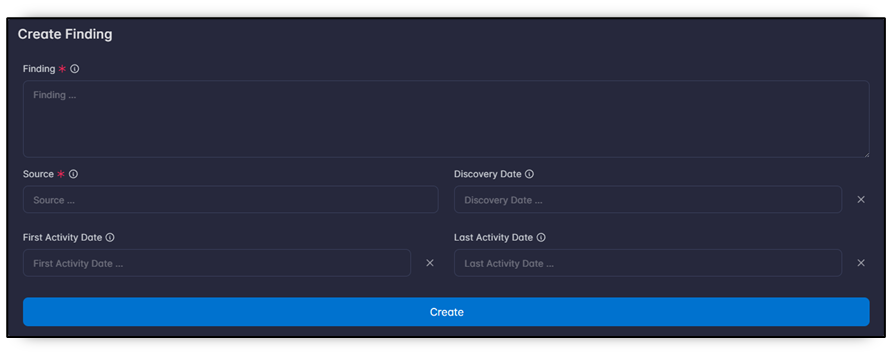
Create Case Finding
To manage analyst-confirmed findings related to attacker activities:
-
Open the case page.
-
Select the Findings tab.
-
Review findings in the timeline chart.
-
Click a finding in the chart to open details and associated IoCs.
-
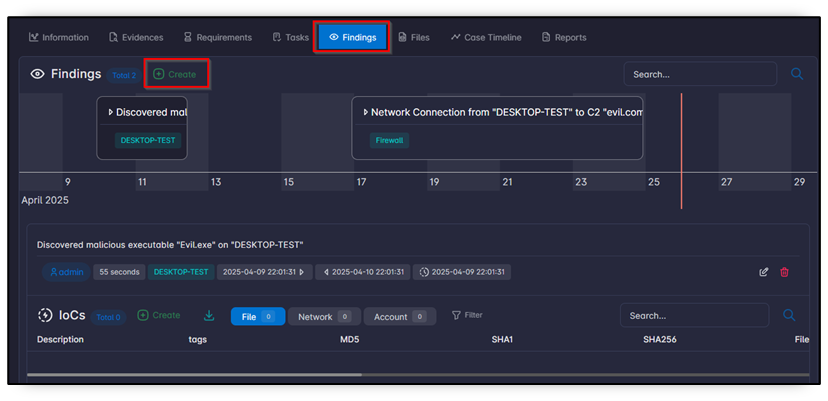
Click Create to add a new finding.
-
Fill finding information and save.
Create IoC Associated with Finding
Add IoCs to a finding to capture forensic indicators linked to confirmed suspicious or malicious activity.
-
Open the finding page.
-
Select the target finding.
-
In finding details, click Create in the IoCs table.
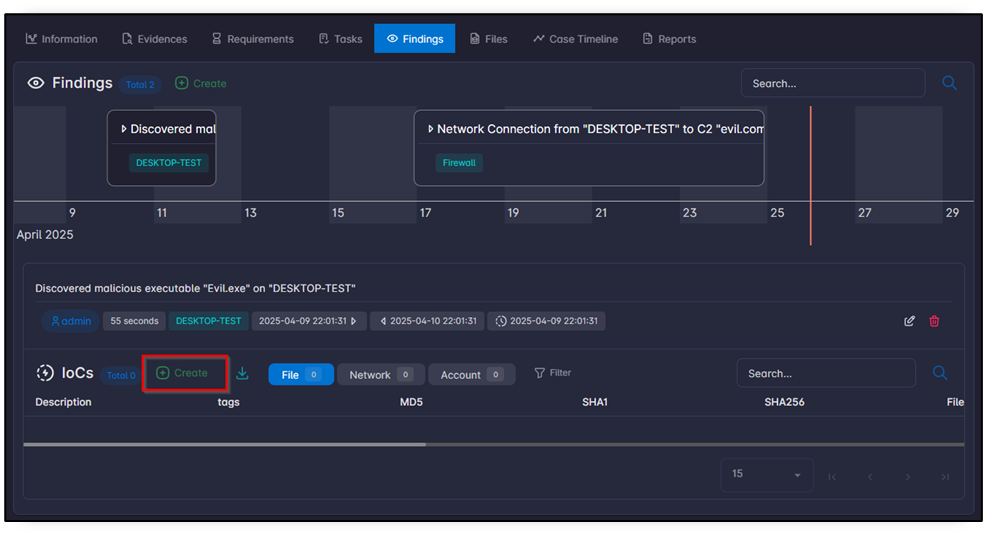
-
Select IoC type (File, Network, or Account).
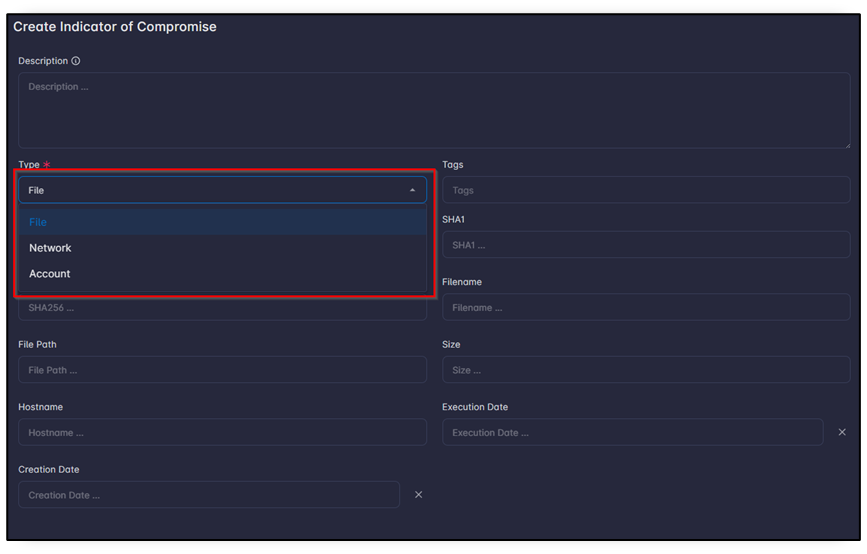
-
Fill in the IoC information and click Create.
List All IoCs in Case
Review all case IoCs in one place to validate indicators, compare types, and manage entries efficiently.
-
Open the case page.
-
Open the Findings tab.
-
In the IoCs table at the bottom, review all IoCs related to findings in the case.
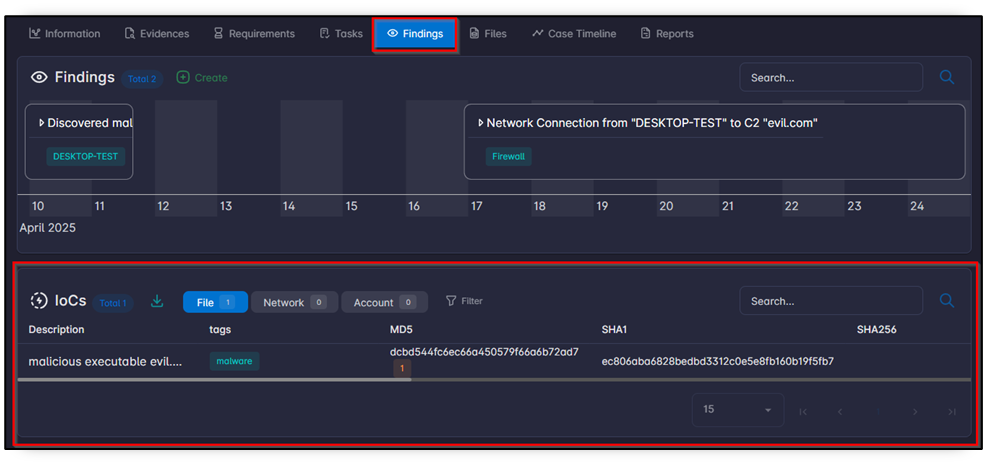
Note
If an IoC exists in another case, a yellow badge appears beside it indicating how many other cases contain the same IoC.
-
To edit or delete an IoC, go to the Actions column.
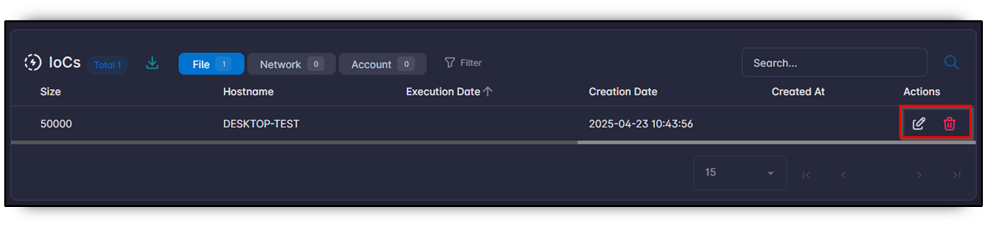
Download IoCs
Export IoCs to CSV for sharing, offline review, or ingestion into other security tools.
-
Select the required IoC type tab.
-
Click Download.
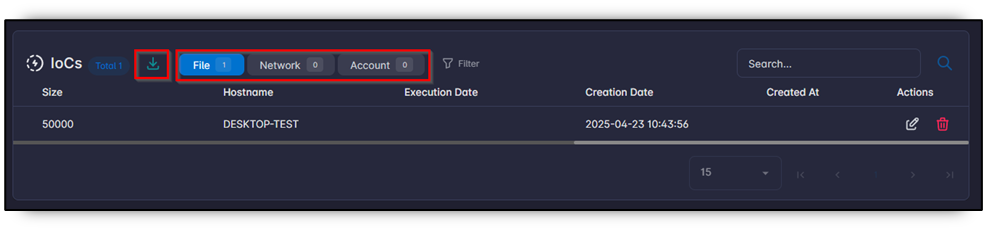

-
Save the exported CSV.
Generate Case Report
Generate a structured case report from case data using predefined report templates.
Users can automatically generate case reports from information stored in the system. Reports use predefined templates in the CASE_REPORT category, which helps standardize documentation and reduce manual effort.
-
Open the case page.
-
Open the Reports tab.
-
Click Create.
-
Select the report template and report name (password is optional).
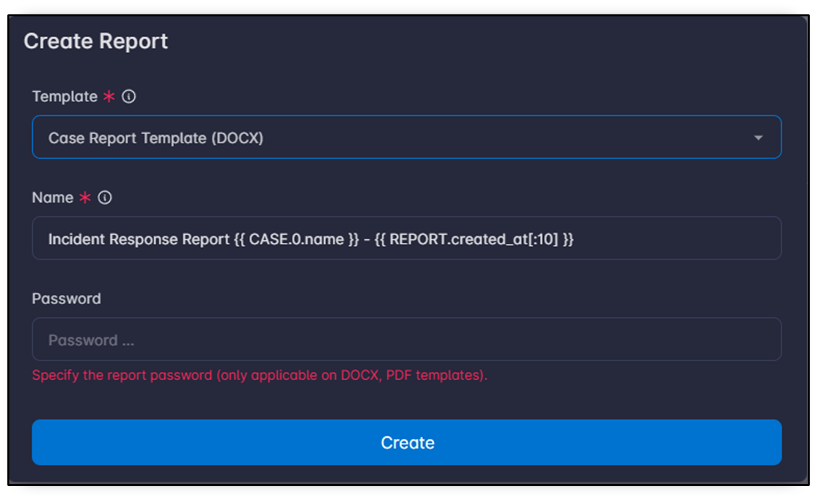
Note
The report name can use Jinja format. Refer to the Template Management section for more information about Jinja formatting.
-
Submit generation.
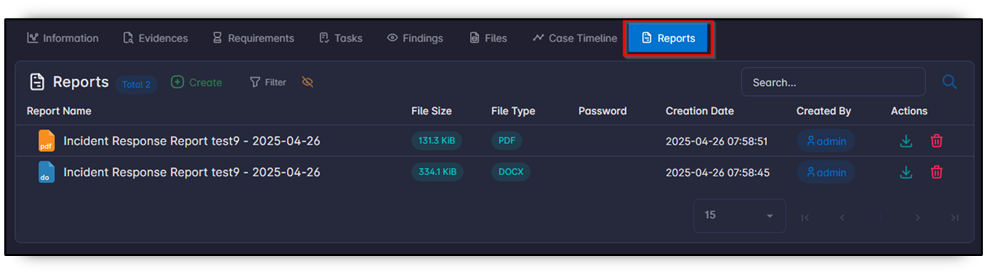
Download Case Report
Download generated reports for distribution, archival, and case documentation.
-
Open case reports from the Reports tab in the case page.
-
Find the target report.
-
Click Download.

Note
Refer to the Template Management section to customize generated report templates.
-
Save the file locally.