Create and Manage Workflows
Overview of creating workflows, step-by-step screenshots from the Workflows list through the graph editor, and duplication.
Overview
A workflow is defined in two stages: metadata (name, author, version, description, icon (required), disabled flag) and the graph (nodes and edges on the canvas). You start from the Workflows list: create a row, then open the graph editor to add Start, actions, and End (and anything else your process needs).
This page walks through creating a workflow in the UI. After it exists, you can duplicate an existing workflow to fork it.
Create a Workflow (Step by Step)
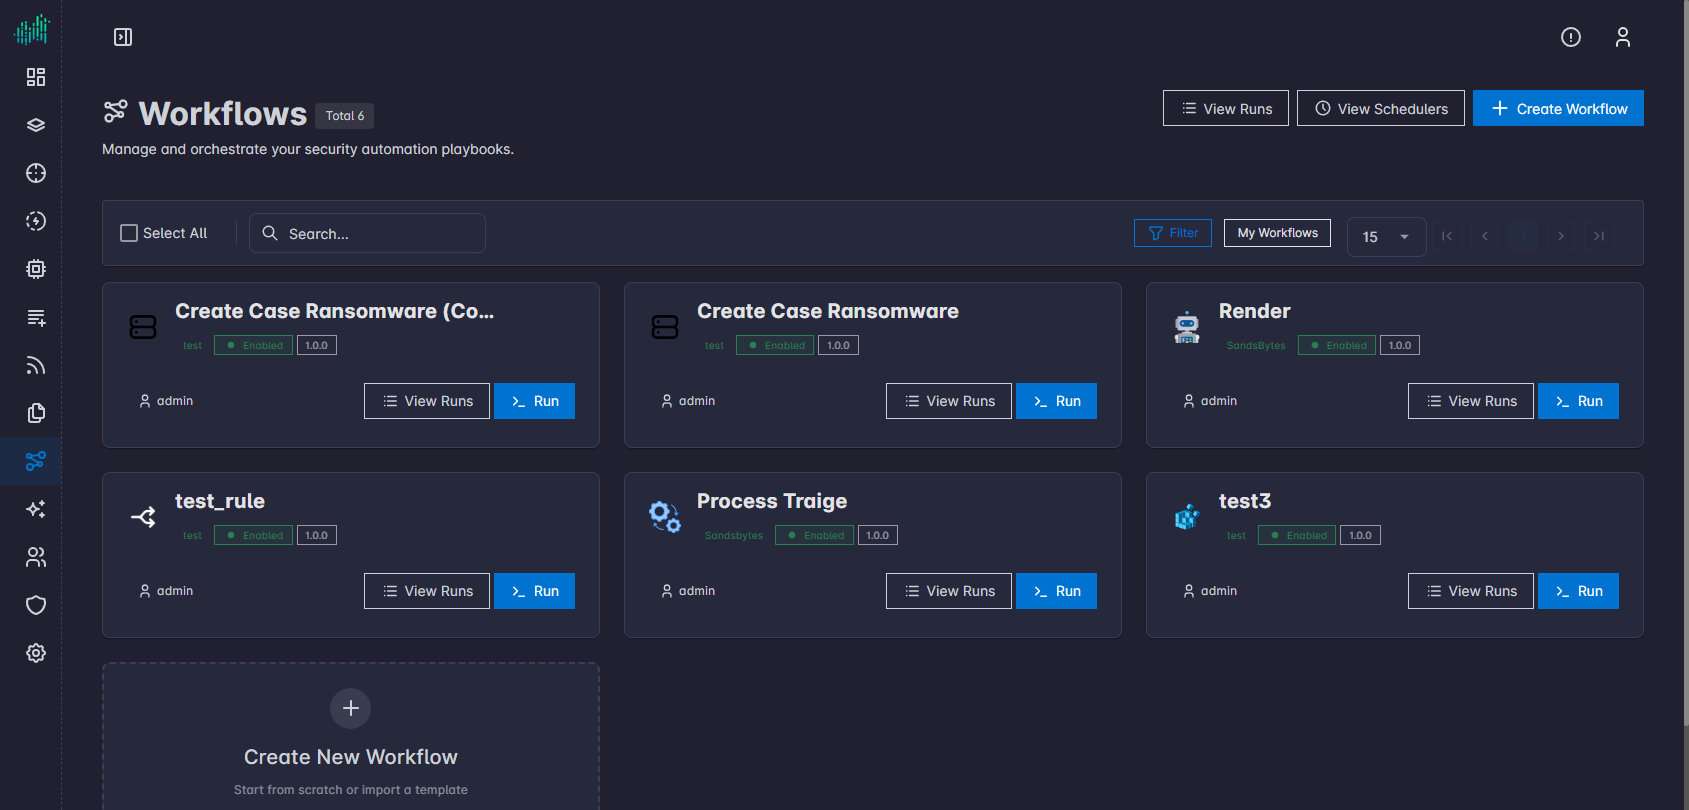
Step 1: Open the Workflows List
In the main sidebar, choose Workflows. You should see the list header, Create Workflow, and your existing workflows (if any).
Step 2: Start Create Workflow
Select Create Workflow. A Create Workflow dialog opens with fields for Name, Description, Author, Version, Icon (required), and Disable workflow?.
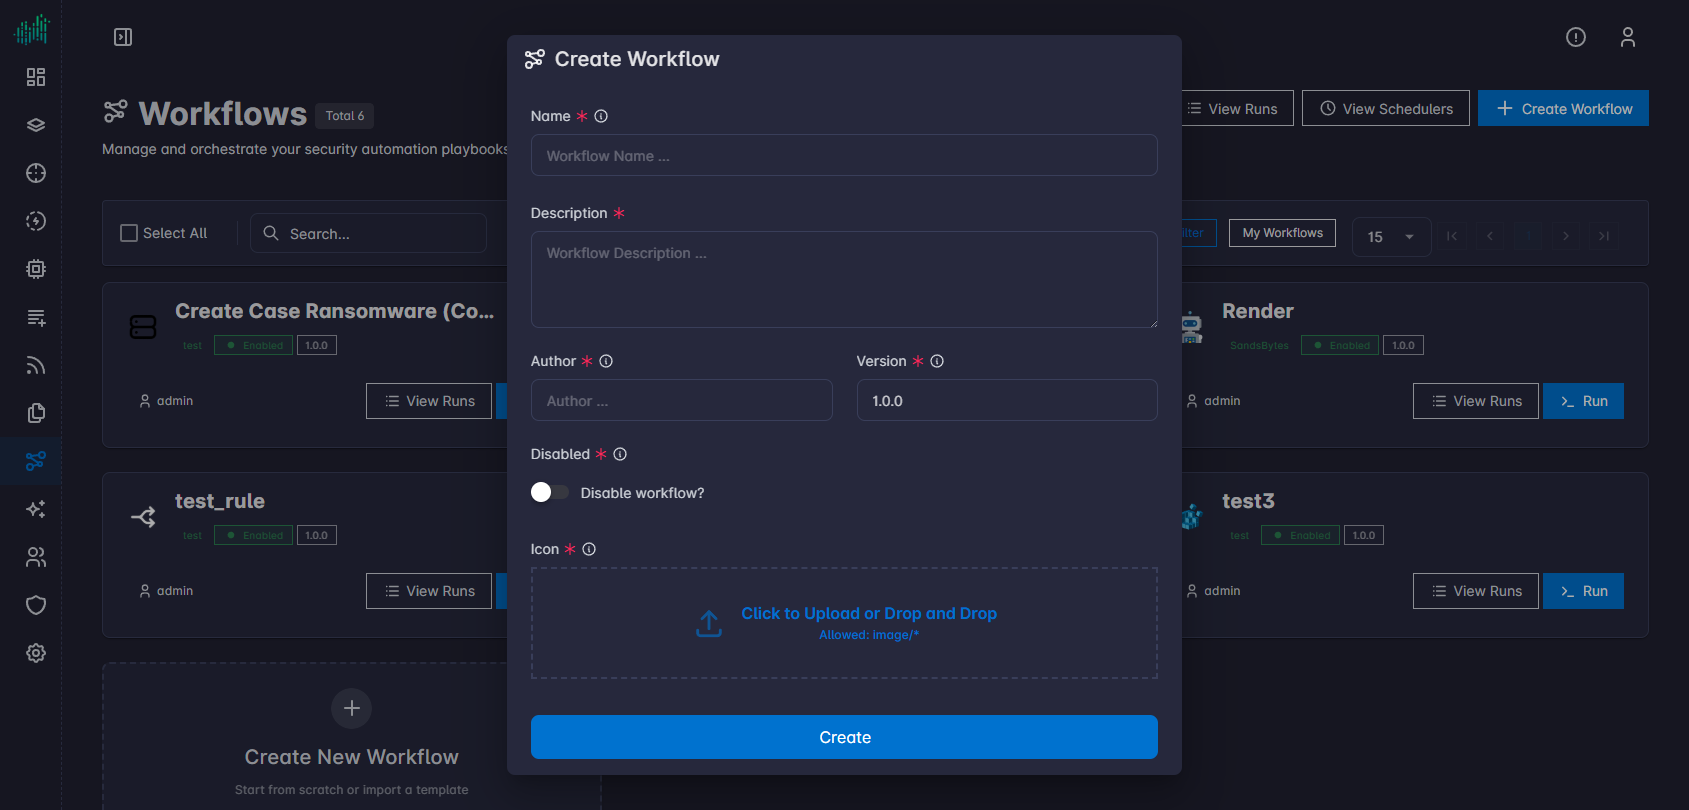
Step 3: Enter Metadata
Fill in all required fields:
- Name — what appears in the list and editor title.
- Description — short summary for others (and for yourself later).
- Author — who owns or maintains the definition.
- Version — often 1.0.0 to start; bump when you make breaking changes.
- Icon — required. Use Choose File or drag and drop an image (image/ types as shown in the dialog). The workflow cannot be created until an icon is provided.
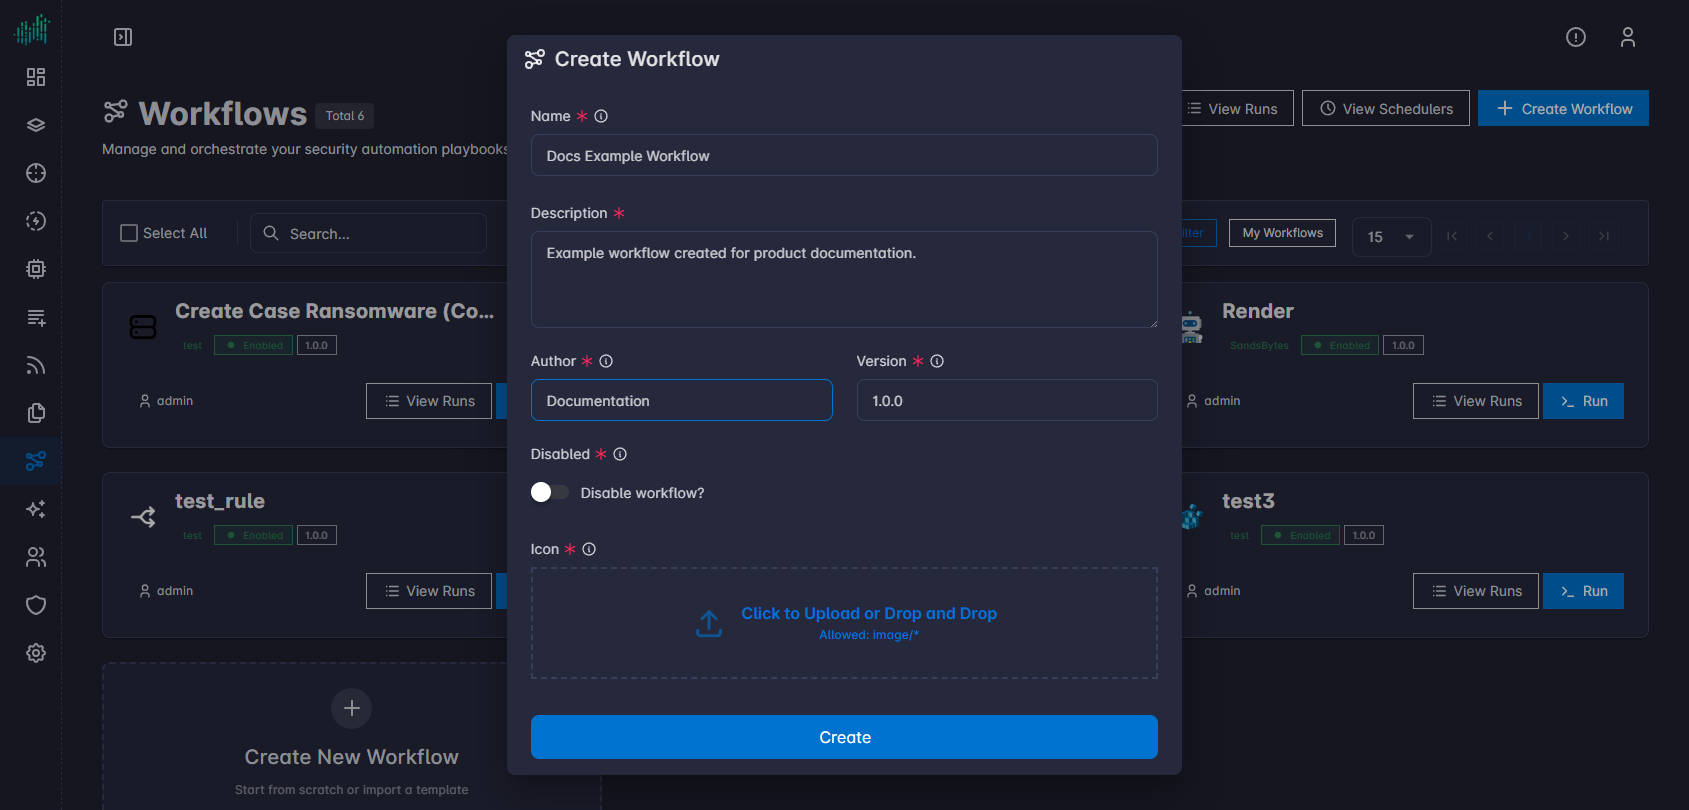
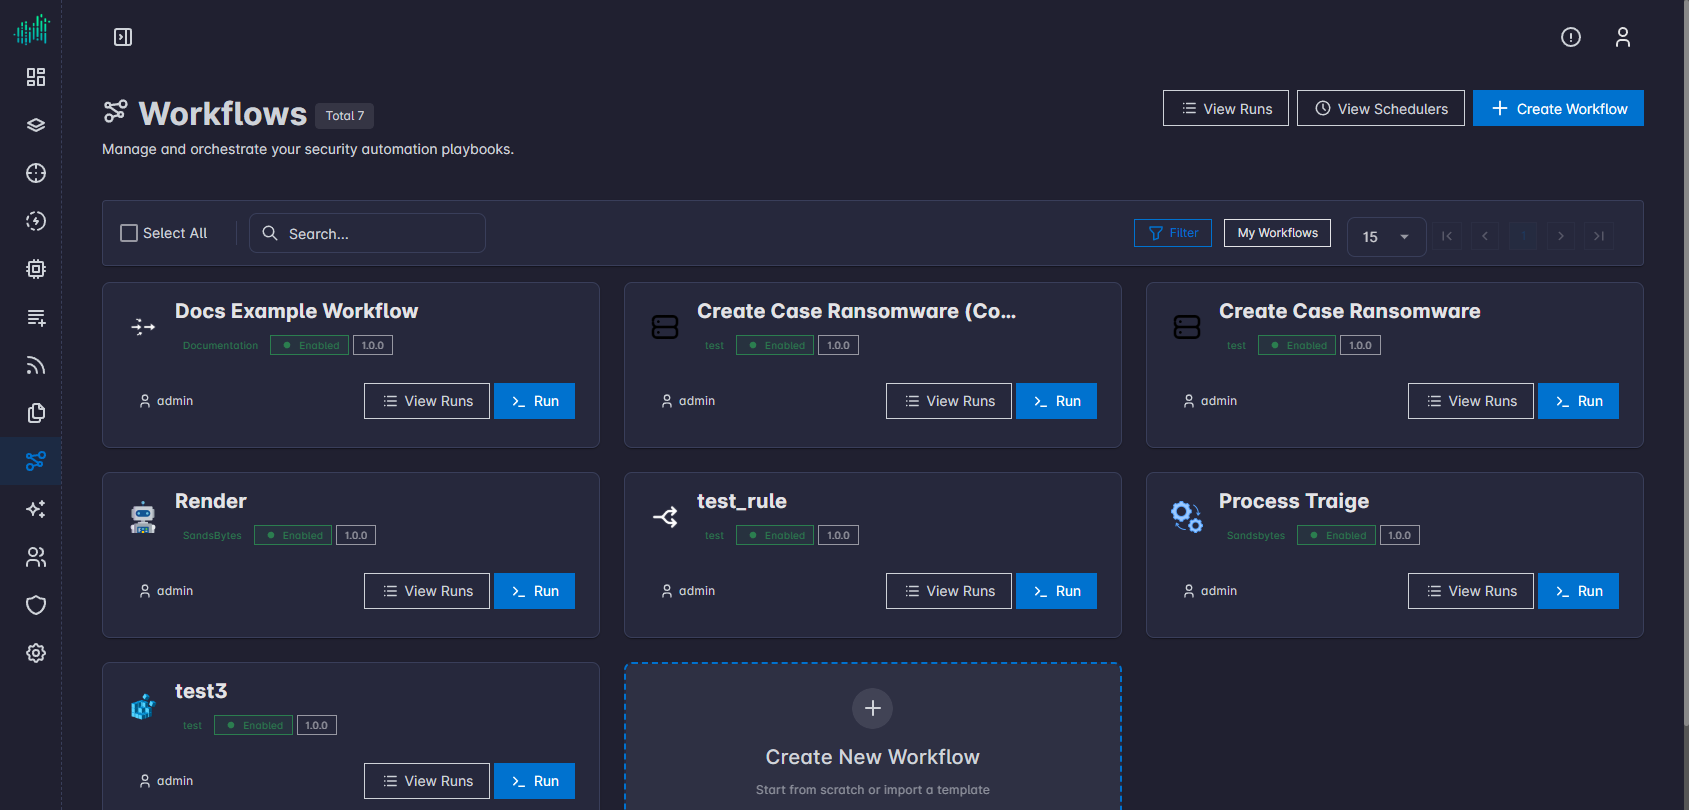
Step 4: Save the New Workflow
Click Create in the dialog. The dialog closes and the new workflow appears in the list (usually at the top), with status Enabled and your Version.
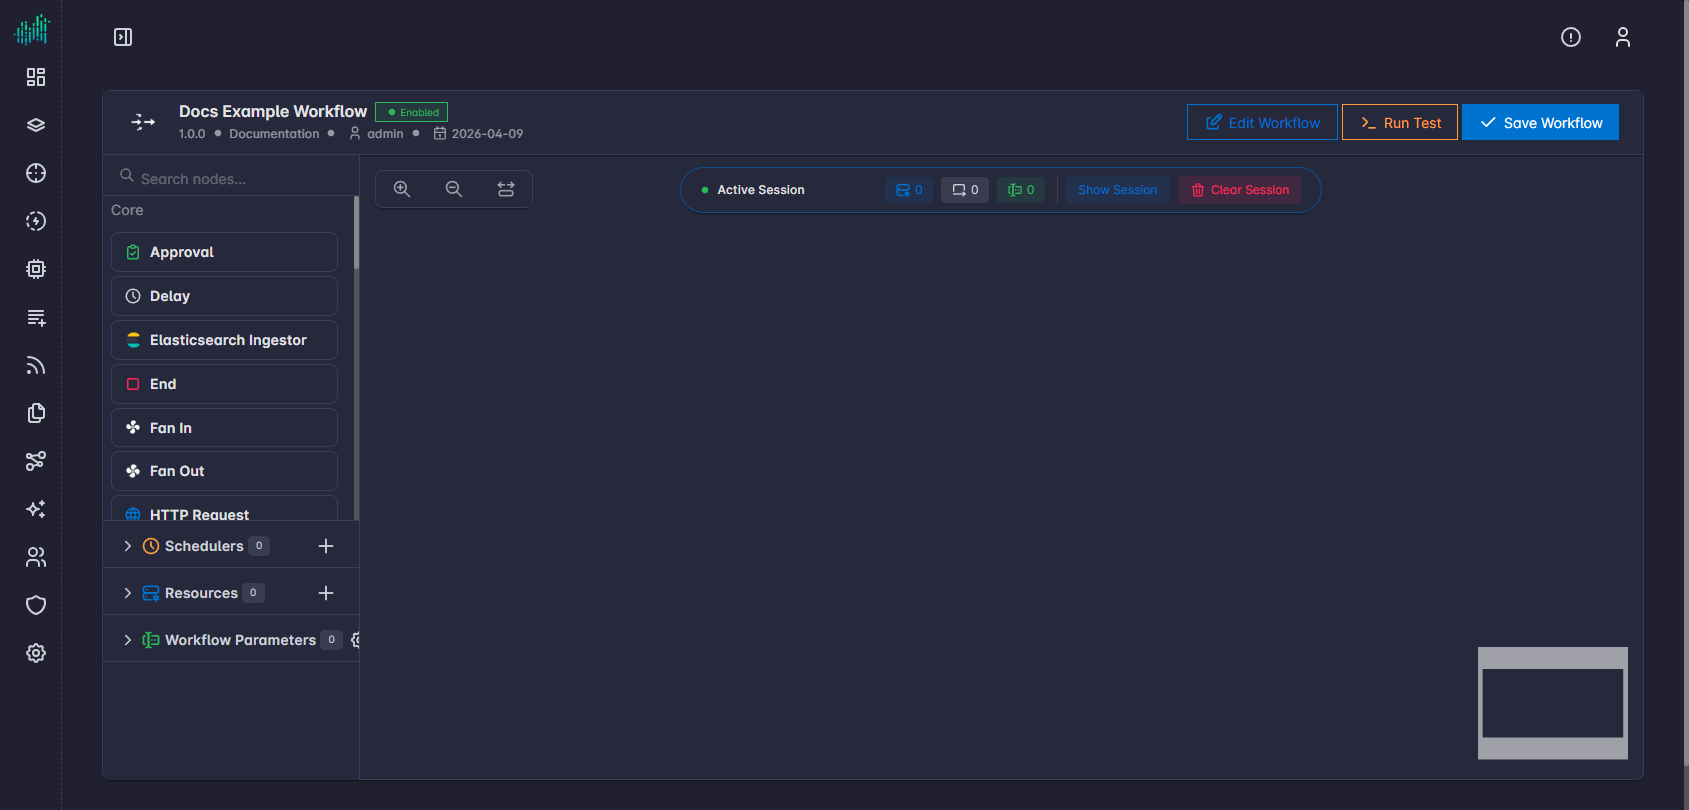
Step 5: Open the Graph Editor
To design the automation, open the graph editor (canvas) by clicking the workflow’s name in the list row.
On the canvas you can drag nodes from the sidebar, connect edges, set workflow parameters, resources, and schedulers for this workflow, then Save Workflow. A brand-new workflow often starts with an empty canvas until you add nodes.
For day-to-day canvas use, see Workflow Editor (Canvas).
Duplicate a Workflow
Use Duplicate in the row ⋮ menu when you want a full copy of an existing workflow instead of creating one from scratch. Open the menu on the workflow row to see Duplicate alongside View Runs, Download, Edit, and Delete.
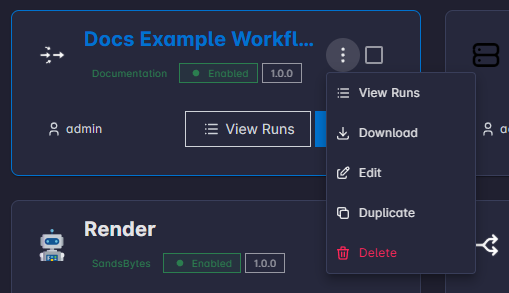
SandsBytes duplicates the entire workflow (metadata, graph, and related definition). The new row appears in the list with the same name as the original plus ** (copy)** (for example My workflow (copy)). Click the new workflow’s name to open the graph editor; use Edit Workflow in the header if you want to rename it or change other metadata.